
Wind Powered Light up Pinwheel
This tutorial will show you how to make a wind powered light using parts from broken electronic devices. This tutorial has been successfully accomplished using a broken CD-ROM drive and also a broken VCR.
Equipment Used
1. Standard $.99 pinwheel from Wal-Mart2. Broken old CD-ROM drive (important parts below)
* Electric engines
* Every gear you can find in the drive
* Small screws that attach the engines or other parts
3. 6 strands of copper wire stolen from an old cable
4. An LED from a random box of LED's from Radio Shack
5. Soldering Iron and Solder
6. Two .22 shell casing (may not be needed)
7. 90 second setting epoxy glue from Home Depot
8. Some scissors or a knife
9. Some sort of file for plastic
10. Wire Cutters
11. A screwdriver
12. A drill
13. A PCI or AGP mounting bracket
Figuring out What Motor Will Work Best
In the CD drive I broke apart there were three electric engines. One for opening the drive tray, one for moving the laser, and one for spinning the CD. THESE ARE HOW YOU WILL GENERATE POWER FOR YOUR LIGHT. Once you get the motors out (you will probably have to break some plastic), take your LED and put its ends on the contacts of the motor. Spin the motor with your finger and see if you can get the LED to light up. You should be spinning the motor much the same way you would spin a top when you were a kid. If the LED doesn't light up, try reversing the posts of the LED on the motor. The best motor will be one that lights up the light and is also very easy to spin. We don't want to have to make a gear train to hook the motor to the pinwheel. I ended up using the motor from the drive tray.Preparing the Pinwheel
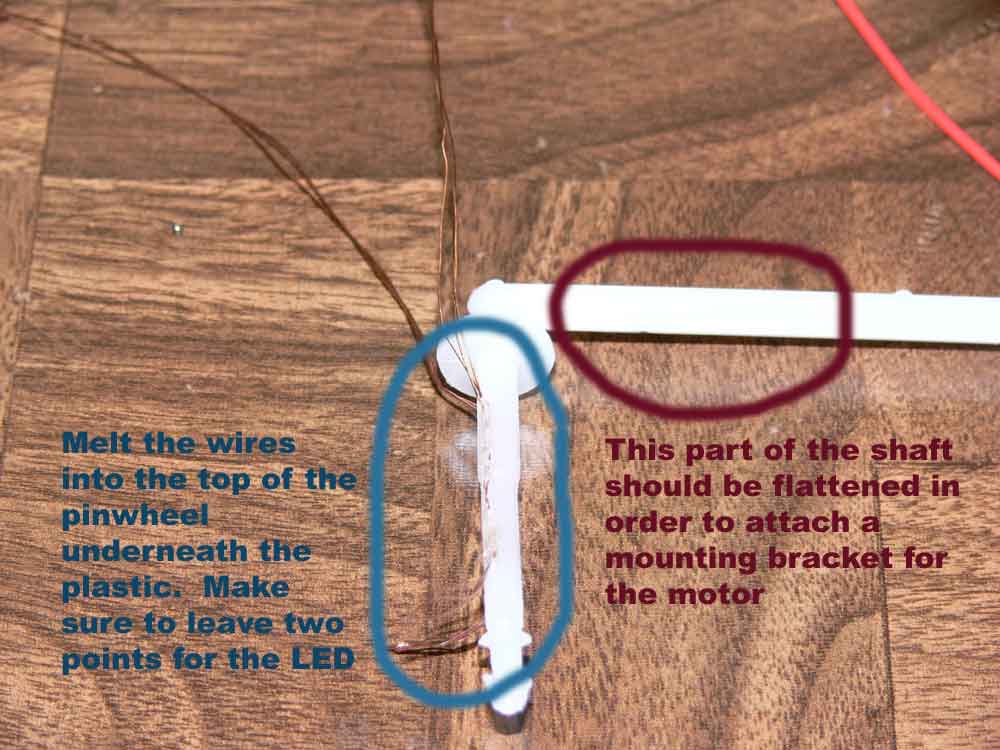
Gearing up
The next thing we want to do is figure out what gear we will use to connect to the fan. I used the big spur gear that was part of the rack and pinion assembly that opens and closes the drive. However, I had to drill out the center of this gear in order to get it to fit on the shaft of the pinwheel. Find the spot on the pinwheel shaft that the gear spins best. You should then make this gear hold still some how. I glued a .22 shell casing on the shaft in front of the gear and put a screw behind the gear. I used the .22 casing in order to help hold the gear upright because it was very sloppy on the shaft.Motor Mount Bracket
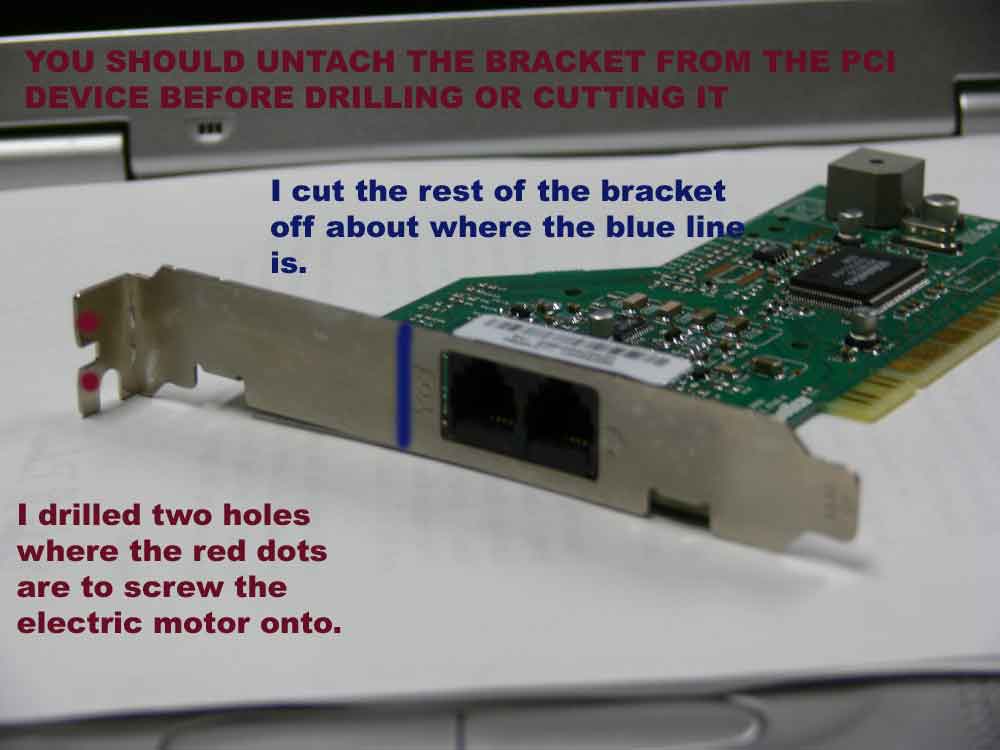
Mounting the Motor
After the holes are drilled so that they fit your motor, take two screws that fit the motor and screw it to the bracket. Now hold the bracket with the motor on it up to the flat part of the pinwheel shaft and see how you have to bend the bracket in order to get a good mesh with the gear you previously attached that will be hooked to the fan.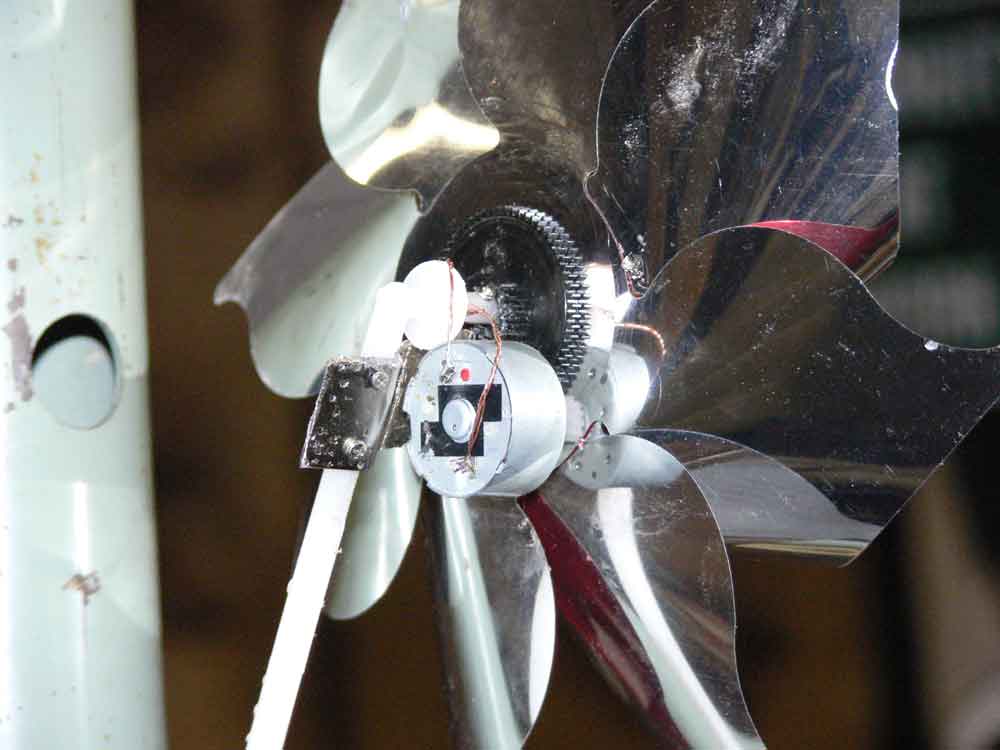
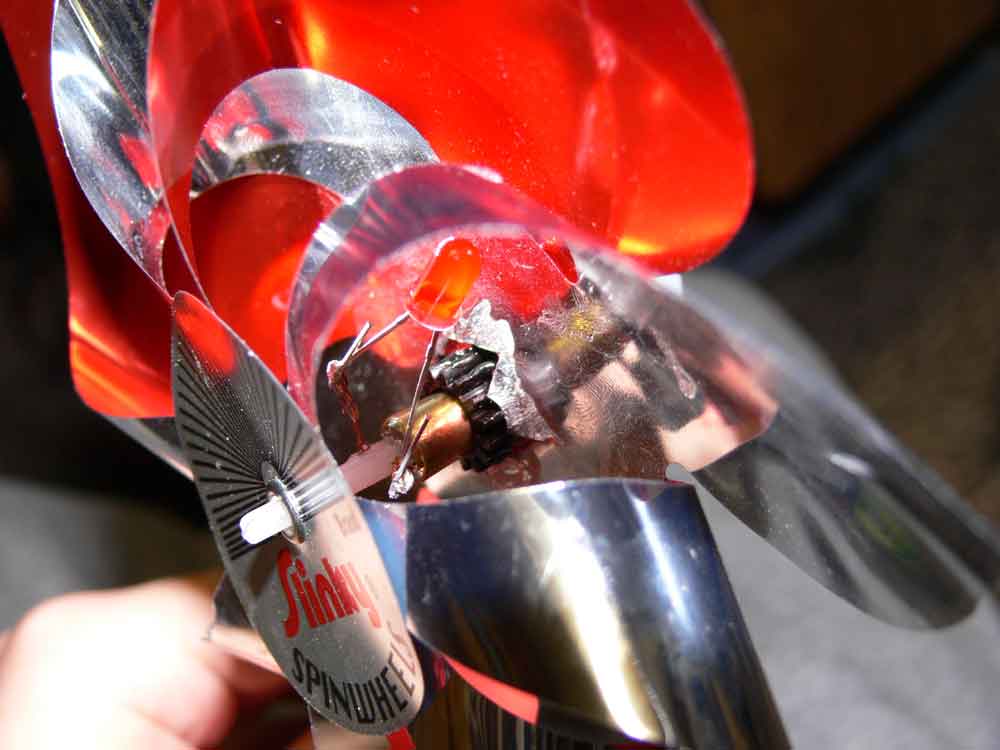
Gluing the Pinwheel fan to the Main Gear
After the motor is hooked up, the next step is to glue to pinwheel fan to the gear on the pinwheel shaft. I cut slits into the back of the pinwheel so that it would fit around the front part of the gear. I then used epoxy to glue the pinwheel to the gear. Until I actually glued the fan to the gear it would always slip off.Soldering the LED and Wire to the Engine
Comments
kenn

March 19, 2013 12:50 am
where's the video?
Charles
September 27, 2010 8:38 pm
You're quite wrong kelsoe. The red pinwheel featured in the videos and pictures on this page:
http://www.technogumbo.com/tutorials/Wind-Powered-LED/Wind_Powered_LED.php
Is this pinwheel. The one from the CD drive is a lot more rugged than the one I made from a VCR.
kelsoe

September 27, 2010 08:38 am
lol.. u cant even see it though
Morgan

December 11, 2008 10:57 am
lol That's my hand!!! hehe! :) :)
Comments are currently disabled.
