
Turning a Headshot Into a Pixel Art Sprite Sheet
Sun, 23 Aug 2026 10:00:00 EST
I wanted to see how far I could get turning a single headshot photo into a pixel-art character sprite sheet - the kind of 4-direction, 9-frame walk-cycle grid you'd drop into an old-school RPG. Everything had to run locally on a laptop RTX 4060 with 8GB of VRAM, so no cloud GPUs, no giant models. This post covers what I originally set out to build, why the "obvious" approach failed after a lot of testing, and the very different approach I ended up using instead. I've included some of the actual test outputs along the way.
The Original Plan: Split Style and Identity
Training one model to learn both "pixel-art style" and "this specific person's face" from a small, from-scratch dataset isn't realistic on consumer hardware. So I split the problem in two, following the standard approach used by a lot of community pixel-sprite tooling:Identity was going to come from IP-Adapter-FaceID, a pretrained face-identity adapter for Stable Diffusion. You don't train this part - you download the weights and condition generation on the input headshot's face embedding at inference time.
Style and layout was going to come from a LoRA I'd train myself, fine-tuned on a set of pixel-art sprite sheets that all shared one consistent grid layout, teaching the base model to reliably reproduce that exact grid-of-poses format.
The plan: headshot in, face embedding plus the trained style LoRA plus Stable Diffusion 1.5, sprite sheet PNG out.
Building the Training Set
It was hard to find CC0 sprite sheets in a consistent grid, pose, and style. Training a LoRA to reproduce "a grid" when the grids in the training data don't agree with each other is a recipe for an unreliable output grid, so I scrapped that set.I switched to compositing my own 200-image training set from the Universal LPC Spritesheet Character Generator's asset repo - body, hair, and clothing layers combined programmatically, all sharing one 576x256, 9-frame x 4-direction walk-cycle layout. Hair color was randomized per sheet by recoloring against the LPC project's own named color palettes. First pass at "randomized" hair turned out to not be randomized at all - every hair asset ships in one default reddish-orange.
Training the Style LoRA
Using kohya_ss / sd-scripts against SD1.5, the first training pass (40 images, network_dim 32, 10 repeats x 20 epochs) overfit hard and memorized one specific character no matter what the prompt said. Growing the dataset to the full 200 images and backing off to network_dim 16 / 2 repeats / 8 epochs fixed it - multi-prompt sanity checks confirmed hair color and body type now actually followed the prompt instead of collapsing to one look.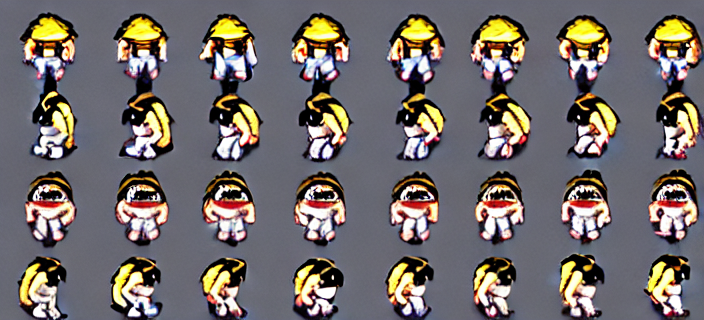
Phase 3: Identity Integration (This Is Where It Fell Apart)
With the style LoRA working, the next step was wiring in IP-Adapter-FaceID so a headshot photo would drive the identity of the generated character. First I confirmed the adapter plumbing actually worked in isolation - feeding it a headshot with no pixel-art LoRA loaded, just plain photorealistic SD1.5 portrait generation.

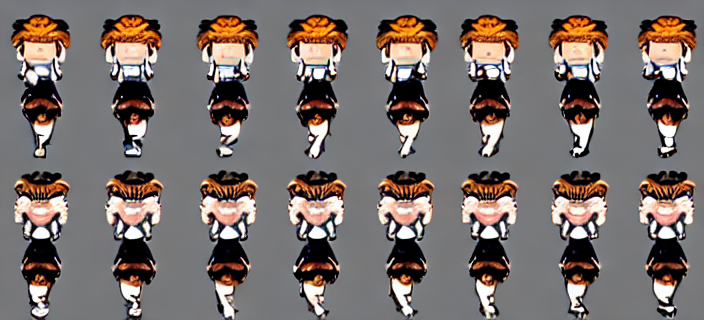
The root cause, as far as I could tell: IP-Adapter-FaceID's identity LoRA and its cross-attention face conditioning are both applied globally across the whole canvas. That's fine for a single portrait. It's a bad match for a 32-cell sprite grid, where each cell needs to render an independently distinct pose while the identity conditioning is simultaneously pulling the entire canvas toward "one face." The two objectives fight each other at the pixel level, and nothing I tried found a stable compromise.
After exhausting the reasonable parameter space, I marked Phase 3 a dead end and went looking for a different approach.
The Approach That Actually Works: No Diffusion at All
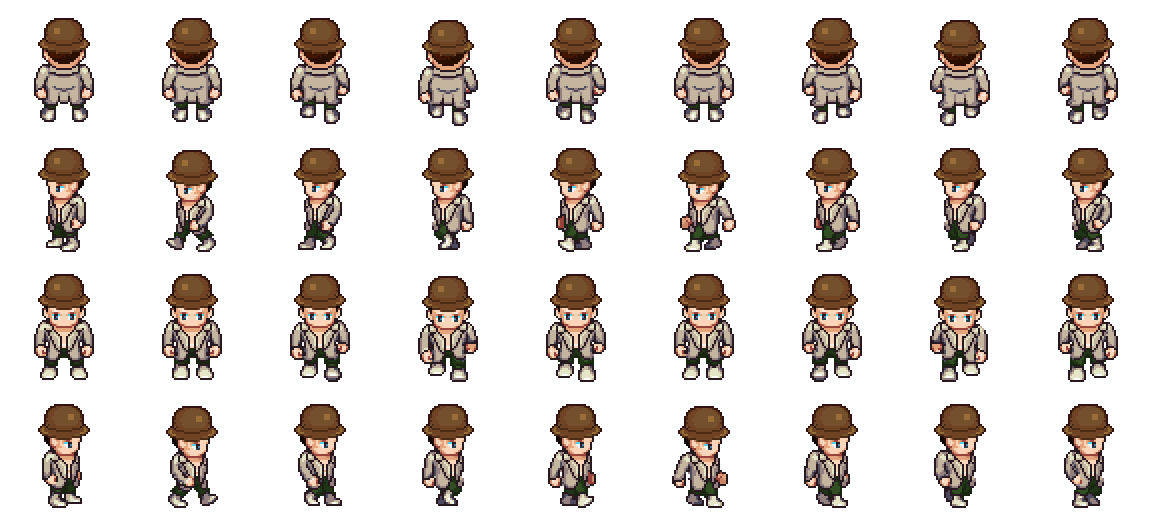
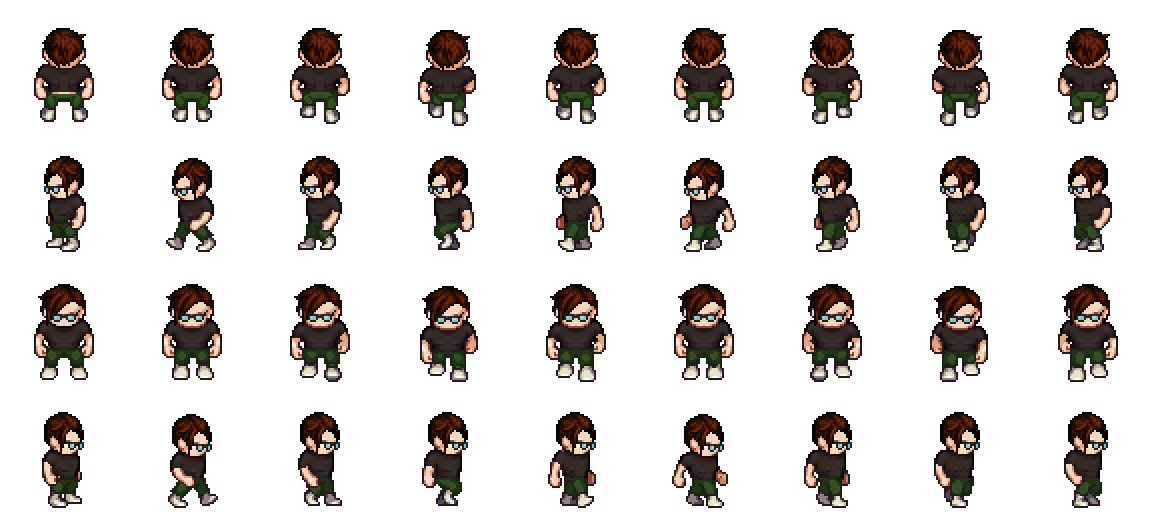
The pieces that already worked were the deterministic ones - the LPC compositing pipeline that built the training set in the first place always produced a clean, legible sprite sheet, because it's just assembling real hand-drawn asset layers rather than asking a diffusion model to hallucinate a coherent 32-cell grid from noise. So I dropped diffusion from the identity path entirely and built a pipeline that composites a real sprite sheet directly from the headshot:1. Face detection - InsightFace (SCRFD) finds a face bounding box and landmarks in the headshot. Tightly-cropped close-up photos failed detection outright at the default settings, so there's a fallback cascade that retries at smaller detection sizes until one succeeds.
2. Color sampling - median RGB is sampled from the headwear, hair, skin, and clothing regions of that bounding box, then matched to the nearest named color in the LPC asset repo's own palette data. Plain RGB distance kept favoring gray swatches over correctly-hued ones by chance, so the matching now uses only the palette's mid-tone swatches plus a penalty for saturation mismatches.
3. Attribute detection - CLIP zero-shot classification checks the photo for a hat, a jacket versus a plain shirt, one of ten curated hairstyle categories, and glasses, so the right asset layers get picked automatically with no manual flags needed.
4. Compositing - the matched LPC layers (body, head, eyes, hair, torso, hat, glasses) get stacked into the same 576x256 walk-cycle template used to build the training set. Pre-recolored assets like jackets and hats get picked by matched palette name; plain-colored assets like a t-shirt get recolored with a multiply-blend tint instead, which preserves the garment's own shading - an earlier attempt using straight hue substitution washed out badly on dark, desaturated colors.
Here's what that pipeline produces from the two test headshots.

Licensing
This matters enough to call out on its own: the sprite assets this pipeline draws from - and the sheets used to train the (now-unused) style LoRA - come from the Universal LPC Spritesheet Character Generator project. They are not CC0. They're licensed CC-BY-SA 3.0 / GPL 3.0 (the project aggregates contributions from many pixel artists, each retaining their own license terms within that family). That means share-alike and attribution requirements apply to anything built from these assets.What's Left
This is an old school technique made a lot easier with models mixed in. I still want to figure out the recipie for a diffusion based solution, then eventually get that to run on lightweight devices.Three.js Advanced Bar Graph Visualization
Mon, 30 Mar 2026 10:00:00 EST
This graph was created from United States Census 2024 American Community Survey 1-Year Estimates, Civilian Employed Population 16 Years and Over. The graph includes the states of Massachusetts, Michigan, and Ohio. It shows the number of population working within each type of industry. This graph was created using Three.js.
↗ Open graph in a new window
With the ever increasing capability of programming tools creating custom displays like this is easier than ever. Although this is a simple data set, programming tools are getting better and better at ETL (Extract Transform and Load) operations. A good library like Three.js can also create many opportunities for exciting new ways to communicate data findings with much broader audiences. Will we soon find the answers to some of humanities most important questions buried in data? I think some of the most interesting revelations will still require more detailed or automated collection operations.
Growing German Chamomile Lifecycle Guide
Tue, 05 Nov 2025 10:00:00 EST
(The following article is comprised of the text transcript from the referenced youtube video.)
Today I'm going to walk you through the steps that I use to grow German chamomile in a container. And I'm going to walk you through the entire life cycle for the year in 2025. First things first, we exist here and grow in USDA Hardiness Zone 6A and 6B. So we're negative 10 to 0 degrees Fahrenheit in the winter. The soils are different everywhere so that makes a big difference as well as you know if you're enjoying gardening.
Starting Indoors: April 2025
Here we are in April 13th 2025. On the left we have four chamomile plants on the right. There's some lavender in the cell tray. You can see there's some powdery mildew in this larger chamomile plant. You can take care of that with simple hydrogen peroxide in a spray bottle. I don't know what other methods other people use but that is probably the most simple and widely available that we use when we're growing inside. Preparing for the summer.Moving Outdoors: Late May
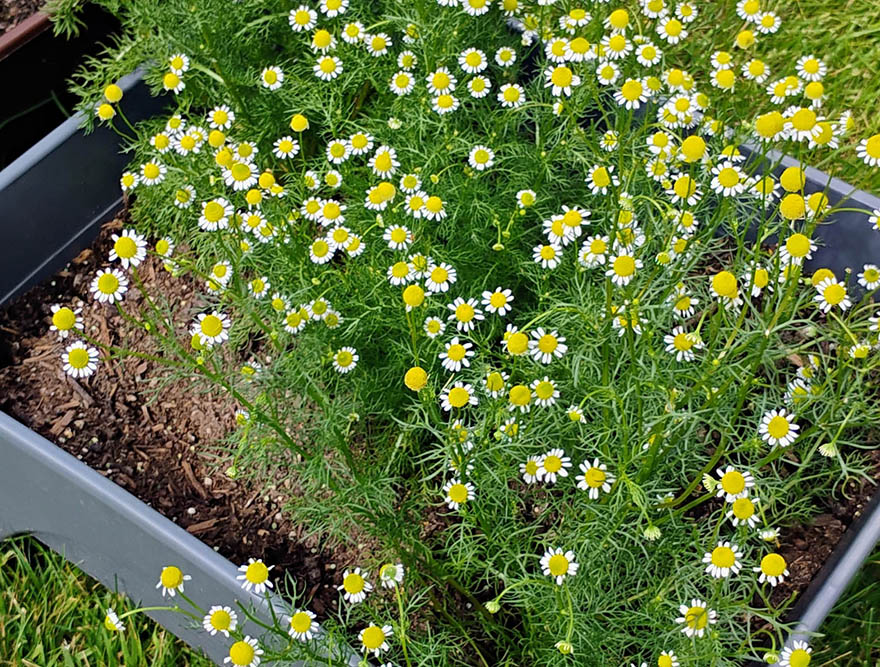
Here is May 24th. This is the first day this got out into a container as a bottom reservoir. And it was kind of late in the season honestly. We didn't achieve 50 to 60 degrees consistently Fahrenheit outdoors until late May of this year. So here it is May 24th 2025. Just a week or so later June 2nd 2025. You can see that rapid growth.First Flowering and Harvesting: Late June
Continued Growth: Summer 2025
Here's another one. Here it is at July 26th. So you can see it just kind of continued to rapidly expand. I stopped really harvesting this and just let it kind of fall on the ground. At this point in time I kind of just let it go because I already had enough for a very long time. It was very low maintenance. No disease it got to this the entire time when it was outside. A lot of flying insects like to come to these so I really wash them and only take the most pristine flowers from them. And they propagate so quickly that you can really be very picky in terms of what you're going to keep.Harvest Results: November 2025
So here's the result. This is on November 4th 2025. You can see this. I had dried them throughout the year. If you use one to two of these that's the amount that is typically in a tea you would buy in the store I would say. So the key is you just let them steep for about 10 minutes in hot water. And they are like I said you only need one to two of them.And here it is. Check this out. This is the plant itself on November 4th. That's today 2025. And so it has receded itself kind of late in the season. I stopped picking any of the flowers. You can see it actually has a few on there still amazingly. We've had a few freezing temperatures at night. We're getting into zero degrees Celsius or 32 degrees. We're getting below that probably twice a week now. And I will probably cover this and keep the water off it during the winter. That I don't think this plan is expected to survive over the winter, especially out of the ground because its roots will get very cold. But I'll put it up somewhere warm and try and maybe cover the top. And maybe it'll survive for next season.
Key Takeaways
So I hope this has been helpful. And I would greatly encourage you to check out this plant on your own. It's very easy to grow. I had read that when I was doing my research that it was very easy to grow. But I didn't believe it. But it really is. And it's a fun plant to have around. It smells great in your garden. And it's great for tea and any other culinary experiments you want to try with it. So good luck with this plan. And I hope you found this helpful.