
How to Fix Bent CPU Pins
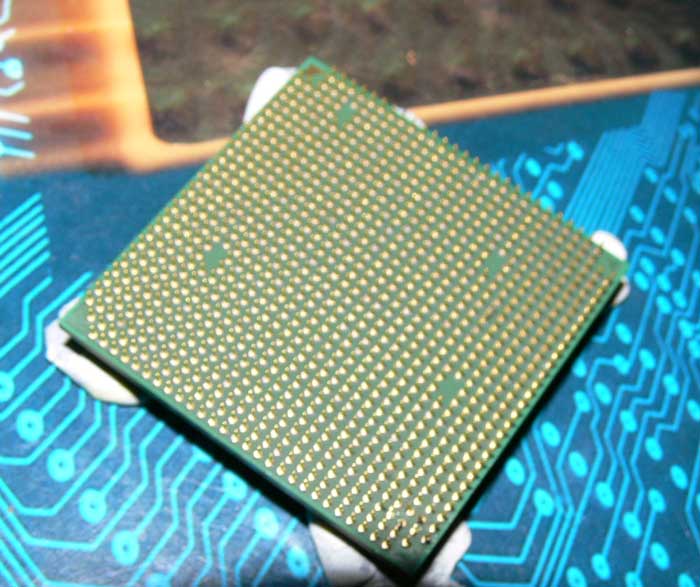
Out of all of the components of a modern personal computer there isn't any component that I can think of that has more potential to cause problems during installation then the processor. It�s the heart of the system, and in that aspect if you mess it up, be prepared to suffer undue amounts of frustration. I recently had the pleasure of performing a colossal blunder which accidentally led to the pins on my CPU becoming so bent that the chip would not fit back into the socket. I was distraught beyond belief because the process of ordering a new processor would take a minimum of a week even with expedited shipping. After taking a few minutes and formulating a plan, I was able to create a nifty little tool for bending even the most dastardly of crooked CPU pins back in to shape.
Tool List
1. Jack Knife or thin piece of metal2. Some sort of pliers
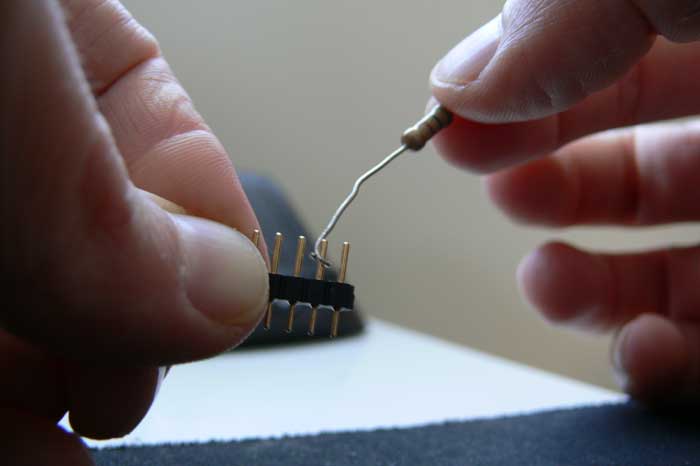
3. Something small that you can bend into a small loop (I used a resistor, but a small paper clip would work as well)
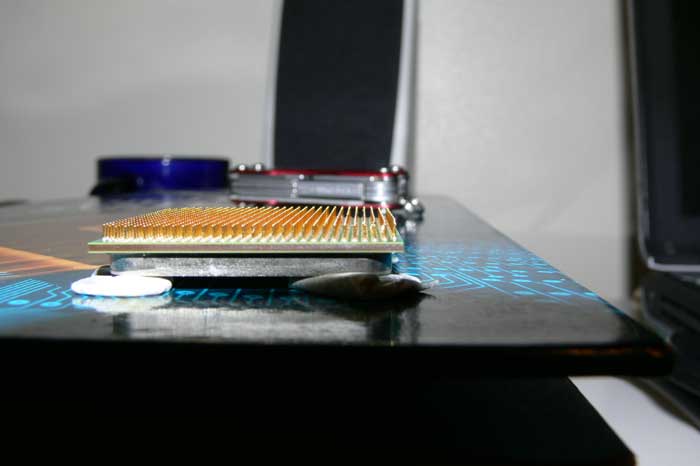
4. Something to hold the CPU in place as you work on it(I used poster putty)
Step 1 - Find a Piece of Metal
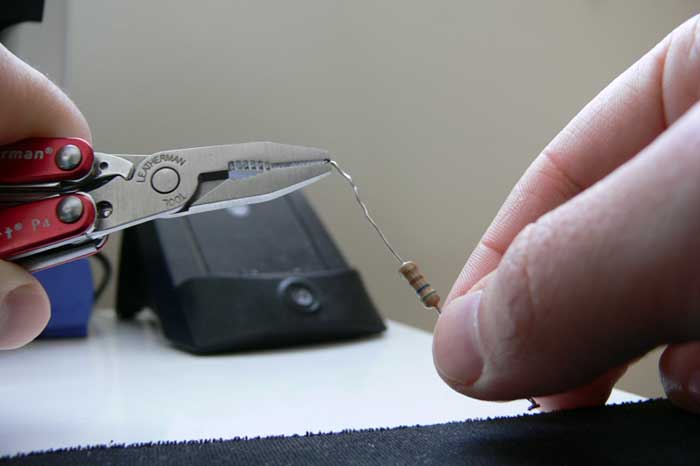
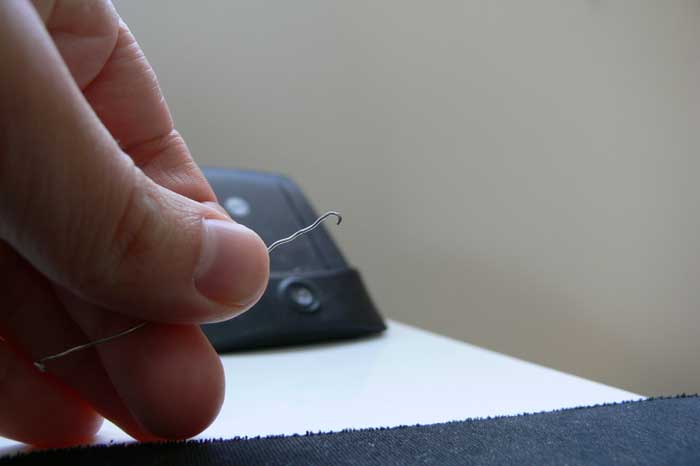
Step 2 - Bend the Hook
Step 3 - Fasten Down the CPU
Step 4 - Smallest Problem Goes First

Step 5 - Fish Hooks
Step 6 - Be Patient
Repeat steps 4 and 5 over and over with a lot of patience until the pins look straight enough to fit back into the socket. It took me a few tries before I was able to get them straight enough. The processor is now happily running in the computer that I am using to write this article.Comments

http://www.youtube.com/watch?v=CnTq3gbLIAQ&feature=youtu.be
Ashley,
I hope you get it fixed. I hate putting a CPU in a motherboard. It's always like...hmm am I applying too much pressure or not enough? Then the stupid lever on some mobo's or heatsink fans require tons of pressure from a screwdriver. One tiny slip and your motherboard could be toast too.
Best of luck!

I bought a new mobo as my other one blew!
(don't buy biostar motherboards they are manufactured well!).
Upon removing and putting the CPU into the new mobo slot i applied a small amount of pressure and the CPU slipped - bent one pin. I felt pshysically sick as it's my new AMD Bulldozer...
Thanks for the post it's going to save me money!

Greg,
You sound like a super hero of some sort. The super pin unbend-er! That thermal grease must have been fun.

Some great info here. A month ago I had to repair 16 cpus that had been thrown together in a bag, mixed with thermal grease caked on pins, in general a total mess. It took me awhile but I was able to get every single one working again. I used a fine bristle tooth brush for the dried on compound on the pins, lint free cloth on the smooth surfaces, fine tweezers, a good light source and magnifying stand since trying to unbend thousands of pins strains the eyes! But patience is the key here. Good luck to anyone unfortunate enough to have to go through this.
Best tool to use are eyeglasses screwdriver set. Pick the smallest screw driver, place its flat side against the bent pin, and bend it to absolute straight vertical. Absolute straight vertical is the key. Once you do all of them, attempt to place in the socket gently most it will not go, or one side will go in but not another side, which tells you where to look for one that is not quite straight. Also the slight pressure will have bent the not quite perfect one a little bit more making it easier to find. Find it, fix it, try again. Try to wiggle the cpu in as gently as possible, if you get it in, clamp it down, which will straighten everything out perfectly. One thing, don't put so much gunk on the top of your cpu, you only need a thin sheen of heatspreader compound, not a gunk load as if you were icing a cake. I see these morons do this all the time. You want as much metal on metal as possible. And you want to avoid suction, when you try to take the heat sink off the cpu later.

wow i have to attempt to unbend 200 pins!!!!! im going to try the credit card method though.

When you say "some of them were missing", I guess I dont understand what you mean. Were there actual pins that pulled off the CPU? If there were pins that were just not there, is it possible that maybe you have the wrong socket size CPU for your motherboard? In any case, good luck!

but when i unbended them some of them were missing sad face and now i have to pay 60dollars for a neew one any help
Comments are currently disabled.
